First open the photo that you want to enhance. I always copy my photo and make a new image and paste it, so that I am working on a copy of the photo and not the original.
Pre-work: If your photo is under or overexposed you can spruce it up a bit before we start the tutorial. Here are some simple hints: If your photo is overexposed and too bright, duplicate it and set the top layer to OVERLAY and adjust the opacity until it has good coloring. Merge your layers afterward.
If it is too dark (underexposed), duplicate it and set the top layer to screen, again adjust the opacity until you get decent coloring in your photo. Again merge your layers after this step if you choose to do this.
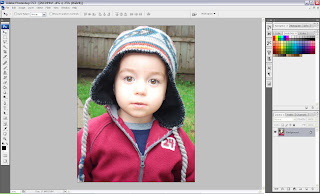
Now lets get started:
1. Duplicate your photo 3 times. While on the top layer choose IMAGE> Adjustments> Black and White. Dont change any of the settings. Just hit OK.
2. Duplicate the black and white layer. On the top most layer change the blend mode to COLOR. On the second to the top layer change the blend mode to MULTIPLY. If this causes your photo to be too dark, then you can adjust the opacity on the middle layer (that is set to MULTIPLY). You should now have 4layers.
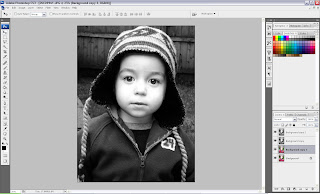
Bottom Layer: color photo
Second Layer: Color photo copy
Middle Layer: Black and white version set to MULTIPLY
Top Layer: Black and White Version set to COLOR.
3. Merge the top 3 layers. Do this by holding down your shift key and in your layers palette select the top 3 layers. Right click in the layers palette and choose MERGE LAYERS.
4. Duplicate your merged layer. Set the TOP most layer to the blend mode of COLOR BURN and adjust the opacity to about 15-25%.
On the middle layer change the opacity to OVERLAY and adjust the opacity to 40-50%.
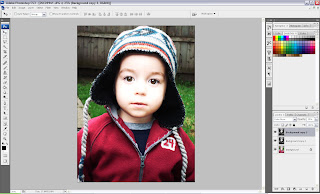
5. Merge all layers. Then duplicate your merged layers so that you have 2 copies of your current photo. On the top layer we are going to do some burning by hand.
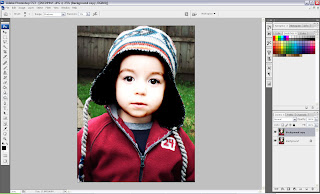
6. Choose a soft brush set to a size of about 50-60 and choose range of shadows and exposure of about 10%. Darken up all the dark areas of the face and hair that you want to stand out. You want to exaggerate this, so make the areas darker than you normally would think. Set this layer to a blend mode of MULTIPLY and change the opacity to anywhere between 30-70% depending on the color of your photo and how dark you want it.
Take a small eraser brush set to about a size of 30, an opacity of 100% and a flow of 50% and erase an areas of the top layer that you want to stand out and be bright. For mine I usually do the irises of the eyes and sometimes the lips. Merge all your layers.
7. Duplicate the image. While sitting on the top layer go to IMAGE> Adjustments>Black and White. Leave all the settings the same but click TINT and change it to the following:
Hue: 42
Saturation: 15
CLICK OK.
8. Set your new sepia toned layer to OVERLAY and adjust your opacity to between 20-50% depending on the darkness of your photo. I adjusted mine down to 40%.
9. Merge layers.
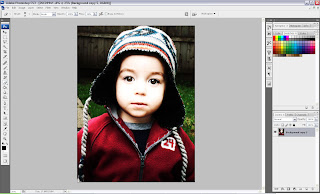
10. Duplicate Layers.
11. While on the top layer got to FILTER>Sharpen>Unsharpen mask.
Change your settings to the following:
AMOUNT: 100%
RADIUS: 7.0 Pixels
THRESHOLD: 0
CLICK OK
Change the opacity of this layer to 60-70%.
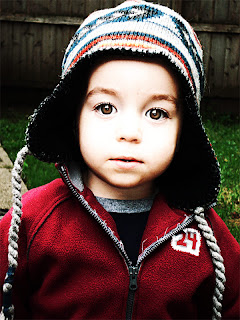
At this point you can add your own details to the image. Maybe adding a small amount of color to the cheeks, dodging the eyes for some added POP. And then you are DONE!!! I hope you enjoyed this tutorial!!


3 comments:
I love this affect. Is there a way to do it in PSE?
Oh thanks for doing this Nicole. I've tried to do it with the old tutorial and always got stuck. Can't wait to use this.
This is awesome Nicole! I love tutorials and this is a great one!
Post a Comment