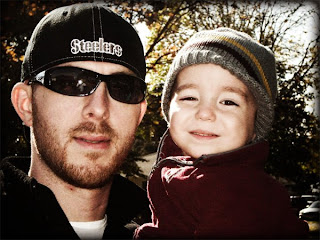
Begin by opening up your photo and converting it to
a layer (rather than leaving it as a background).
Simply right click on your photo in your layers
palette and choose Layer From Background.

Duplicate your photo layer. Right click on the
photo in your layers palette and choose Duplicate.
Click on your bottom layer and go up to
IMAGE> DESATURATE.
This should leave your bottom layer as a black and
white photo and your top layer as an original
colored photo.

Click on your top color layered and change your
blend mode to OVERLAY.

Duplicate your colored photo layer (which is still
set to overlay). You now have a bottom layer that
is black and white and two layers on top of that
both set to overlay.
Click on your top layer. Go to IMAGE>BLACK AND
WHITE.
Click the TINT box so that there is a green check
and change your tint settings to:
Hue: 42
Saturation: 15
Click OK

Reduce the opacity on your new sepia toned layer
(the top layer) to approx. 70% and check to make
sure that the blend mode is still set on Overlay.

We have now created a grungy vintage colored photo
but we still want to add the grunge edge.
Merge all your photo layers into. Right click on
the top layer and choose MERGE VISIBLE.
Right click on the merged image and choose BLEND
OPTIONS (or another way to do this is to click on
your "FX" button at the bottom of your layers
palette).
Once your effects palette has opened choose
INNER GLOW and change your settings to:
Blend mode: Multiply
Opacity: 90
Noise: 0
Solid Color chosen and choose a dark brown or black
Softer
Edge
Choke: 0
Size: 130
Range: 50
Jitter: 50
Click OK

You now have a grunge edge photo! Happy
Scrapping!!!
Before:

After:


7 comments:
Hey, Nicole. Thanks so much for the quick tutorial. I've done these, but fiddled and fiddled. It's so nice to have steps!!
Love the nicely written steps to great pics. I just play and play with mine until I like how they look.
Okay my first try didn't go so well...cause I did it wrong, but in my defense I am new to the photoshop world & I am using elements. So look what I can do, thanks to you!!! You are amazing.
can i do this in just plain photoshop? i got as far as the step click image>black and white.....help!
Hi Nicole love your tutorial, but can you help me some....when I get to where it says BLACK AND WHITE I seem to get lost, I work in PS CS2 and can not find Image-Adjustment-BLACK AND WHITE
Thank you TORA
tg13
I have to write out the tutorial and I am going to try in soon. Thank you!
I tried to follow in PSP...but couldn't quite make it happen. Any chance you might write a tutorial for PSP? Thanks!
Post a Comment